

Introduction
Now that I have a base understanding of the properties of fluids in Houdini it is time to move on to applying that knowledge to oceans. To begin this process I will use another of John Moncrief’s tutorials on Pluralsight: Introduction to Dynamic Oceans in Houdini (Pluralsight, 2015). As I found while watching this, Houdini’s Ocean tool kit has had a bit of an overhaul in the latest version and so there are a few differences I had to work out as the tutorial uses Houdini 15 and I’m on 16. Therefore this post will focus less on the network make up and the node functions, and more on the basic principals of ocean simulation. Fortunately, the intermediate level oceans course on Pluralsight uses Houdini 16, so any of the gaps in my knowledge will be filled there.
the basics of simulating oceans
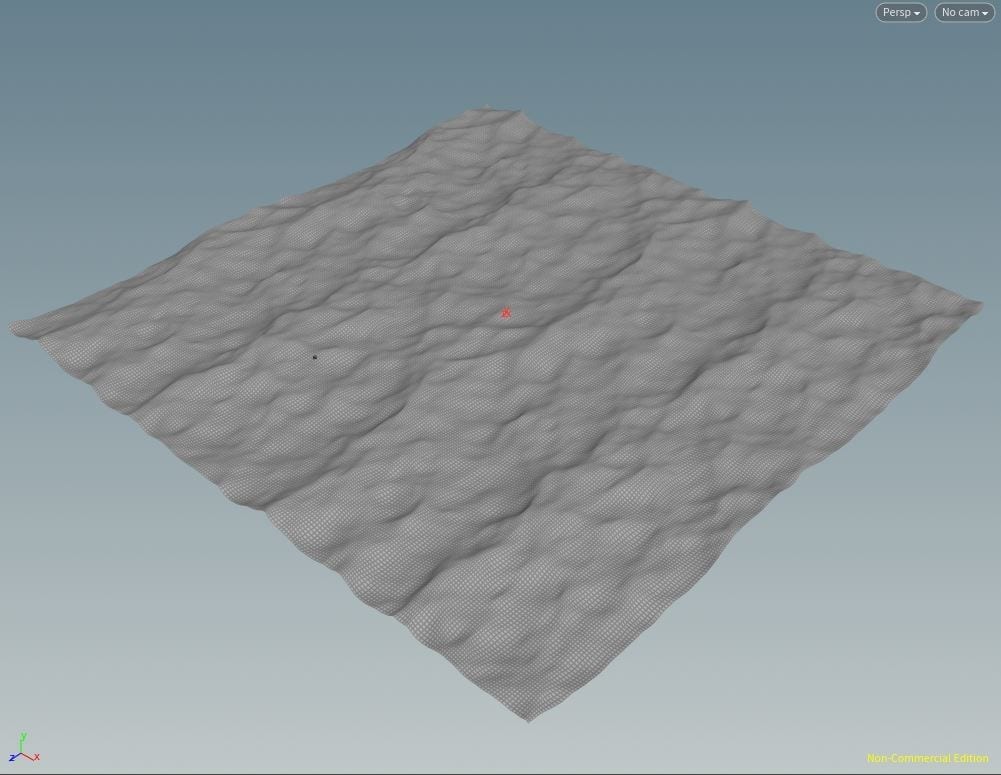
The most interesting thing about simulating oceans in Houdini is that, unlike pyro and FLIP fluid simulations, it doesn’t use any DOP networks or solvers to calculate the process – instead it uses a process galled displacement. This is essentially a flat grid of rows and columns with each point of intersection being raised or lowered an amount calculated by the Ocean Spectrum node.
One thing that hasn’t changed between the two versions is the relationship between the Ocean Spectrum and the Grid. Moncrief recommends using a mathematic expression to optimise the rows and columns based on the resolution of the spectrum – this is 2^ch(“../oceanspectrum/res”). By defining that the number of rows and collins should be 2 to the power of the resolution set in the Ocean Spectrum you can ensure that you always have enough divisions for the level of displacement desired.
Moncrief then proceeds to outline the various parameters of the Ocean Spectrum node and how to bake out the displacement map, however I will cover this further when discussing the next tutorial as there have been some updates to the system.
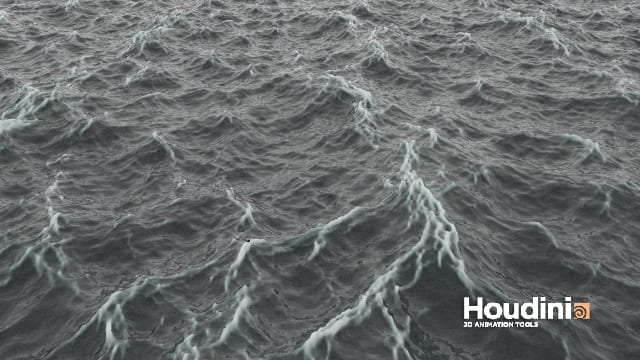
A rendered out ocean in Houdini.

The required expression to link the rows/columns of the grid with the resolution exponent of the spectrum.
UV Tiling
One way in which you can cut down on render times and trick the viewer is by tiling your ocean. The basic principal of this is just duplicating your ocean a series of times so that you are using the same simulation over and over to create a bigger surface. Through a process called UV tiling you can do this seamlessly in Houdini by editing a couple of parameters in the Grid and the Ocean Spectrum nodes. Firstly the Grid Size parameter within the Ocean Spectrum defines the size of the original tile, then the Size parameter in the Grid node defines the size of the actual notion and how much tiling is required. The program will then repeat the tile within the area created.
A 50×50 size Ocean Spectrum UV tiled 4 times into a 100×100 size Grid.
Objects and oceans
Moncrief introduces one method of simulating objects moving on an ocean using the Flat Tank tool. By predefining the path of the object you can add a Flat Tank to your simulation directly from the shelf. This tool creates a FLIP tank around your object that will move with the object and replicate it floating on real water.
Flat Tank
Using the Flat Tank shelf tool creates the same set up as the FLIP Tank from the previous lesson creating an AutoDopNetwork with a solver, an initial network an interior network and a fluid network. Within the initial network is the Boundary Layer tab containing options to edit the padding. As the tank is going to be moving it is important to experiment with this as it defines how many particles will enter and leave the simulation as the tank moves. Other than this it should be edited in the same way as the FLIP Tank from the previous lesson.

A boat positioned in a Flat Tank parented to a curve path.
Whitewater
In real oceans there is more than just the water and Houdini gives users a tool to generate three of these effects using the Whitewater tool: foam, spray and bubbles. When you set up your Flat Tank from the shelf an additional three networks are also created to generate these “whitewater” effects called the whitewater_source, whitewater_interior and whitewater_sim, the last of which is just another AutoDopNetwork. Within the sim network are 2 key nodes that can be manipulated to effect the basic look of your whitewater the Object and the Solver nodes.
Through the Object node you have the ability to visualise the 3 types of whitewater by colour which is worth utilising in the simulation phase as well as the surface, Moncrief actually recommends disabling the bubbles unless you are going to be able to see under the surface of the water as they are only simulated there, this can be done in the Solver.
In the Solver node you can control the actual properties of the foam, spray and bubbles as well as enabling and disabling them. The main controllable features of the foam is it’s lifespan which dictates how long the foam will remain in your simulation before fading out. This is the same with the spray however with this you can also edit the drag of the spray which will effect how the spray reacts to the movement of the tank and the object. Lastly, the bubbles also have lifespan parameters that dictate how long they remain in the simulation, but they also have controls for their buoyancy and advection strength. The advection strength of the bubbles works in a very similar way to the drag in the the spray and it works in conjunction with the buoyancy, through this parameter it can de defined how much lift each bubble has which in turn effects how quickly they rise to the surface.
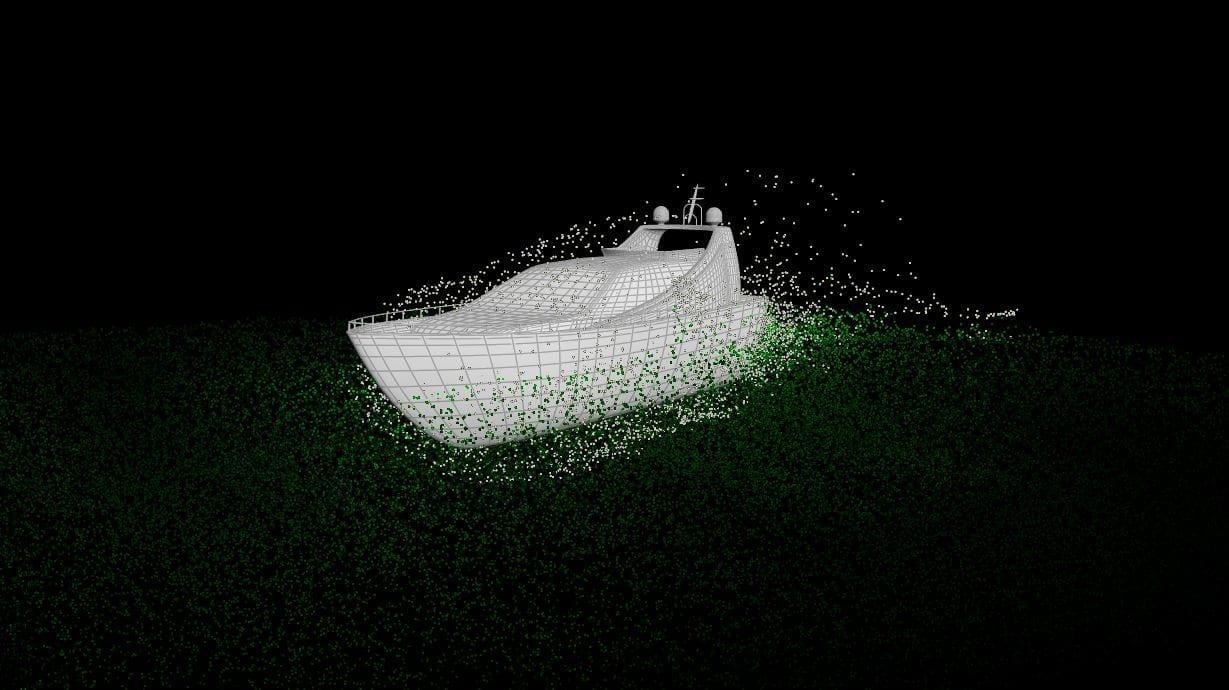
A simulation of the fluid and the whitewater advected by the boat geometry.
End of part 2
Thanks to this tutorial I now have a very basic idea of how oceans work in Houdini, how to set one up from the shelf and how whitewater can be manipulated within a simulation. Unfortunately, due to the backdated version of Houdini and the difference in scene type that I am going for than what was shown in this tutorial, I will likely not use a lot of the techniques covered in this lesson. Never the less it was good to learn the basic principles of simulated oceans and displacement before moving on to a more complex tutorial which, fortunately, will cover my requirements comprehensively.
References
- Pluralsight (2015). Introduction to Dynamic Oceans in Houdini. Available from https://app.pluralsight.com/library/courses/intro-dynamic-oceans-houdini-2116/table-of-contents [accessed 21 October 2018].
- Pluralsight (2017) Houdini: Intermediate Ocean FX. Available from: https://app.pluralsight.com/library/courses/houdini-intermediate-ocean-fx/ [accessed 21 October 2018].